Looking for a festive treat that’s easy to make and hard to resist? This Peppermint Swirl Fudge is the perfect holiday dessert. With its rich layers of chocolate and mint, it’s sure to become your favorite seasonal snack. Plus, it’s simple enough for anyone to whip up! Let’s dive into the ingredients and steps to create this sweet delight that will dazzle your friends and family.
Why I Love This Recipe
- Festive Flavor: The combination of semi-sweet and white chocolate with peppermint makes this fudge a delightful holiday treat.
- Visual Appeal: The vibrant red and green swirls not only look stunning but also add to the festive spirit of the season.
- Easy to Make: This recipe requires simple ingredients and straightforward steps, making it accessible for bakers of all levels.
- Perfect for Gifting: These fudge squares make a wonderful homemade gift, especially when beautifully packaged for friends and family.
Ingredients
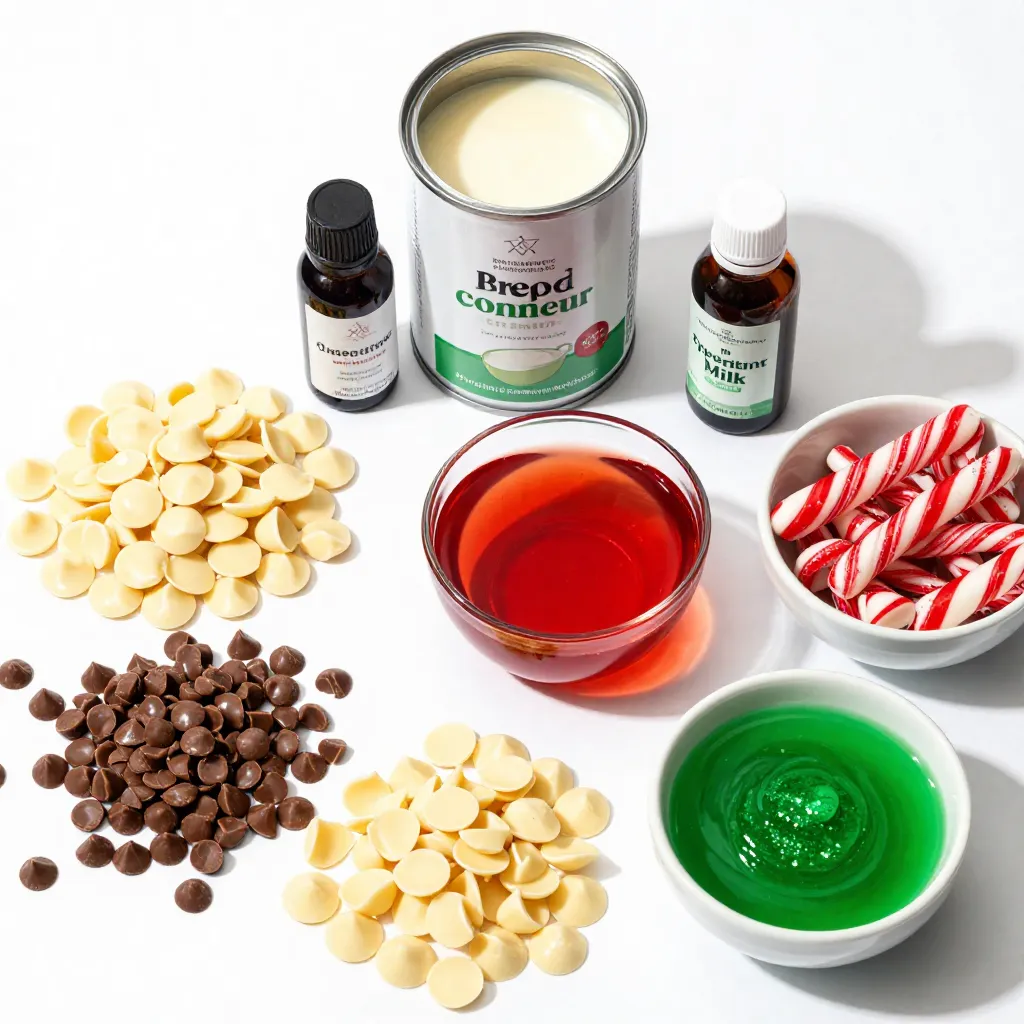
To make peppermint swirl fudge, you need just a few simple ingredients. Each one plays a key role in creating rich flavors and a festive look. Here’s what you need:
– 2 cups semi-sweet chocolate chips
– 1 cup white chocolate chips
– 1 can (14 oz) sweetened condensed milk
– 1 teaspoon peppermint extract
– 1/2 teaspoon red food coloring
– 1/2 teaspoon green food coloring
– Crushed candy canes, for topping
These ingredients combine to create a creamy, sweet treat that bursts with peppermint flavor. The semi-sweet chocolate provides a rich base, while the white chocolate adds a lovely contrast. The sweetened condensed milk binds everything together, making it smooth and creamy. Peppermint extract gives that holiday taste everyone loves.
Using red and green food coloring makes the fudge festive and fun. Finally, the crushed candy canes on top add a nice crunch. You can easily find these ingredients at your local store. Once you gather them, you’re ready to make this delicious holiday treat!
Step-by-Step Instructions
Preparing Your Baking Dish
Start by prepping an 8×8 inch baking dish. Line it with parchment paper. Make sure the edges overhang. This makes it easy to lift the fudge out after it sets. A good lining saves time and keeps your fudge intact.
Melting Semi-Sweet Chocolate
In a medium saucepan, add the semi-sweet chocolate chips. Pour in half of the sweetened condensed milk. Place the saucepan on low heat. Stir the mixture continuously. Keep stirring until the chocolate melts and becomes smooth. This should take about 5 minutes. Once melted, remove it from the heat. Stir in 1/2 teaspoon of peppermint extract. This adds a nice holiday flavor.
Making the White Chocolate Layer
Now, take another saucepan. Combine the white chocolate chips with the rest of the sweetened condensed milk. Again, use low heat. Stir until it becomes creamy and smooth, which will take another 5 minutes. After it’s melted, mix in the remaining 1/2 teaspoon of peppermint extract. This keeps the minty taste consistent.
Coloring and Swirling
Next, divide the melted white chocolate into two bowls. Add red food coloring to one bowl and green to the other. Stir each bowl until the colors mix well. Pour dollops of both colors over the semi-sweet chocolate layer. Use a toothpick or a butter knife to swirl the colors together. Be gentle; you want to see the red and green swirls.
Adding Toppings and Setting
Now it’s time for the fun part! Sprinkle crushed candy canes over the top of your fudge. This not only adds crunch but also looks festive. Place the baking dish in the refrigerator. Let it set for at least 3 hours, or until firm. Once it’s set, use the parchment overhang to lift the fudge out. Cut it into squares for serving.
Tips & Tricks
Perfecting Fudge Consistency
To make smooth fudge, avoid graininess during melting. Use low heat for the best results. High heat can cause the chocolate to seize or burn, ruining your fudge. Always stir gently and often while melting. This helps keep the chocolate smooth and creamy.
Storing Your Fudge
To keep your fudge fresh, store it in an airtight container. This prevents it from drying out. Place it at room temperature for a few days. For longer storage, keep it in the fridge. Just remember to wrap it well. This will help keep its flavor strong and its texture perfect.
Presentation Ideas
Make your fudge look great when serving. Use a decorative platter to show off the colorful swirls. You can also sprinkle more crushed candy canes on top. For a fun touch, tuck in mini candy canes. This adds a festive vibe. Your guests will love the visual appeal!
Pro Tips
- Use Quality Chocolate: Opt for high-quality chocolate chips for a richer flavor and smoother texture in your fudge.
- Cool Gradually: Allow your fudge layers to cool slightly before adding the next layer to prevent them from melting into each other.
- Experiment with Colors: Feel free to experiment with different colors for the white chocolate layer to match the occasion or your personal preference.
- Storage Tips: Store your fudge in an airtight container in the refrigerator to keep it fresh for longer and prevent it from becoming sticky.
Variations
Different Flavor Additions
You can make peppermint swirl fudge even more fun by adding different flavors. Try using vanilla or almond extracts instead of peppermint. These flavors add a unique twist to your fudge. You can also mix in nuts or dried fruits. Chopped walnuts or almonds add crunch. Dried cranberries or cherries can add a sweet touch. Feel free to get creative and find your favorite mix!
Color Alternatives
Color can change the look of your fudge. You can use other food colorings to create bright shades. Try blue for a winter theme or orange for fall. You can also create a holiday-themed fudge by using red and green together. Just remember to swirl the colors gently to keep the pretty patterns.
Dietary Modifications
If you need a dairy-free or vegan version, there are easy swaps. Use dairy-free chocolate chips and coconut milk instead of sweetened condensed milk. This makes the fudge safe for those with dairy allergies. For sweeteners, you can use agave syrup or maple syrup. These options keep the fudge tasty without adding refined sugars.
Storage Info
Refrigeration Guidelines
Peppermint swirl fudge lasts about two weeks in the fridge. Store it in an airtight container. This keeps it fresh and prevents it from drying out. If you plan to eat it later, cut it into squares first. This way, you can easily grab a piece when cravings hit. Make sure to place a piece of parchment paper between layers to avoid sticking.
Freezing Fudge
To freeze fudge, wrap it tightly in plastic wrap. Then, place it in a freezer-safe bag or container. This method keeps it safe from freezer burn. When you’re ready to enjoy it, move the fudge to the fridge to thaw overnight. Freezing may change the texture slightly, making it a bit softer. The flavor, however, stays intact, giving you a tasty treat any time of year.
FAQs
How do you cut fudge cleanly?
To cut fudge cleanly, follow these tips:
– Use a sharp knife.
– Dip the knife in warm water.
– Wipe the knife between cuts.
– Cut in straight lines for neat edges.
These steps help avoid messy edges. A clean cut makes your fudge look great and easy to serve.
Can I use dark chocolate instead of semi-sweet?
Yes, you can use dark chocolate. Dark chocolate has a richer flavor. It adds depth to the fudge. However, it may be less sweet than semi-sweet. If you want a sweeter fudge, consider adding a bit more condensed milk. This will balance the flavors well.
What can I do if my fudge is too soft?
If your fudge is too soft, here are some solutions:
– Place it back on low heat.
– Add more chocolate chips and stir.
– Let it cook a bit longer until thickened.
– Refrigerate it longer to firm it up.
These steps can help you achieve the right texture. You want that perfect fudge consistency!
How long does it take for fudge to set?
Fudge usually takes about 3 hours to set. This time may change based on your fridge’s temperature. For best results, let it chill until firm. You can check if it’s ready by gently pressing the surface. If it feels solid, it’s set and ready to cut!
This blog shared a simple and fun way to make fudge. You learned about key ingredients like chocolate chips and peppermint extract. I discussed step-by-step instructions for making it smooth and colorful. Remember to store your fudge properly to keep it fresh. You can even try variations for new flavors. Fudge is a treat you can enjoy or gift during the holidays. So, gather your ingredients and start creating delicious memorie