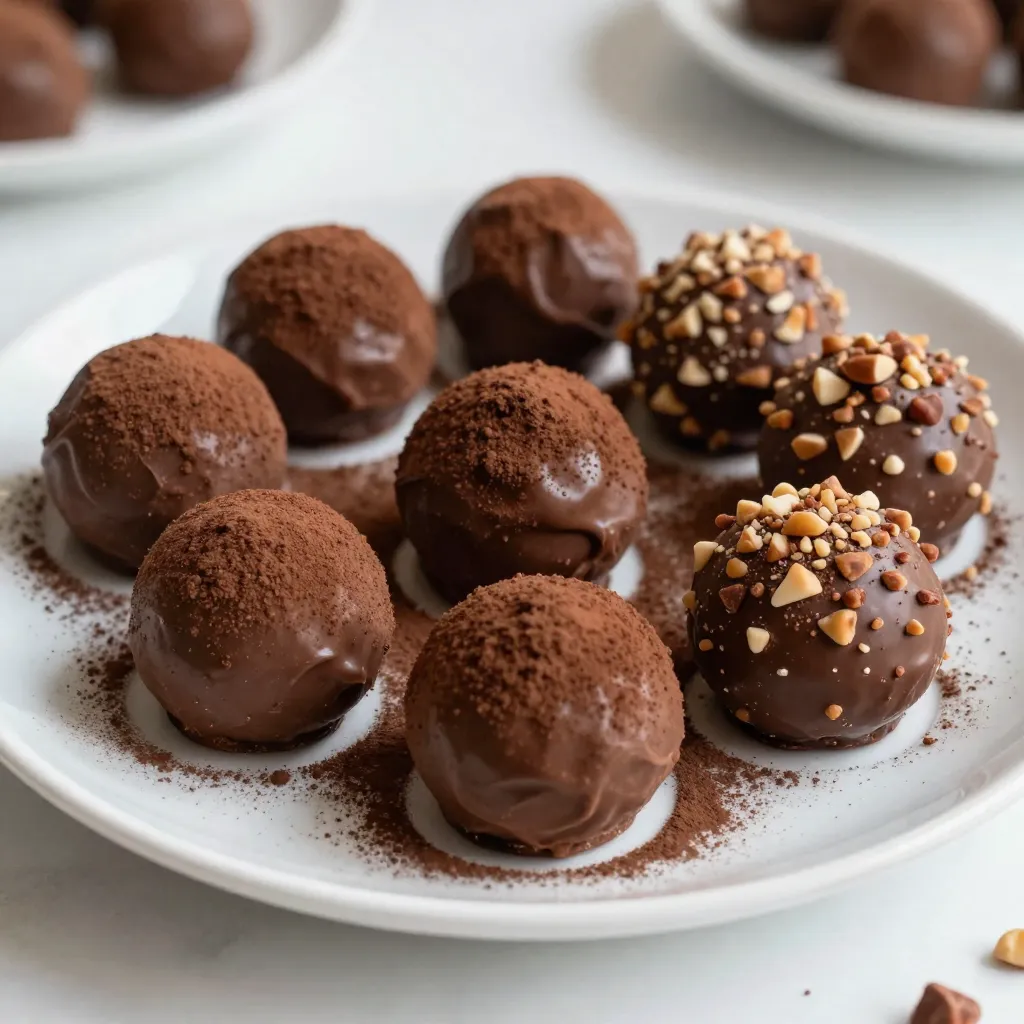
Craving something sweet? Try my Cream Cheese Chocolate Truffles! These little delights blend rich chocolate and smooth cream cheese for an irresistible treat. I’ll guide you through simple steps and tips to make these truffles perfect every time. Whether for a special event or just a personal indulgence, you’ll find delight in each bite. Let’s dive into the easy ingredients and get started on your next favorite dessert!
Why I Love This Recipe
- Decadent Flavor: These truffles offer a rich, creamy chocolate flavor that satisfies any sweet tooth.
- Easy to Make: With simple ingredients and straightforward steps, anyone can create these delightful treats.
- Customizable Coatings: You can roll them in cocoa powder or nuts, allowing for personal touches and variations.
- Perfect for Gifting: These truffles make an elegant gift, especially when presented in decorative cups.
Ingredients
List of Ingredients
– 8 oz cream cheese, softened to room temperature
– 12 oz semi-sweet chocolate chips
– 1 tsp vanilla extract
– 1 cup powdered sugar
– 1/2 cup cocoa powder (for rolling)
– 1/2 cup crushed nuts (choose almonds or hazelnuts)
– Pinch of sea salt
When making cream cheese chocolate truffles, each ingredient plays a key role. The cream cheese makes the truffles rich and smooth. Softening it to room temperature helps it mix better. The semi-sweet chocolate chips bring a sweet, deep flavor. Melting them gives your truffles a nice texture.
Vanilla extract adds warmth and a lovely aroma. Powdered sugar sweetens and helps bind the mixture. Cocoa powder is for rolling, adding a nice touch of bitterness. Crushed nuts give a crunchy bite and extra flavor. Lastly, the sea salt enhances all the tastes, making each bite more delightful.
Each of these ingredients works together to create a treat that is hard to resist. I love to use fresh, high-quality ingredients for the best flavor. This way, you’ll end up with truffles that are not just good, but truly special.

Step-by-Step Instructions
Preparing the Chocolate
Melting the chocolate chips
Start by adding the semi-sweet chocolate chips to a microwave-safe bowl. Heat the chocolate in the microwave for 30 seconds at a time. Stir it well after each interval. Keep going until the chocolate is smooth and fully melted.
Cooling the melted chocolate
Once melted, set the bowl aside. Let the chocolate cool slightly. This will help when mixing with the cream cheese later.
Mixing the Cream Cheese
Beating the cream cheese
Grab a large mixing bowl and the softened cream cheese. Use an electric mixer to beat the cream cheese until it is creamy. Make sure there are no lumps left in the mixture.
Incorporating melted chocolate
Pour the cooled chocolate into the bowl with the cream cheese. Add the vanilla extract. Mix everything together until it is smooth and well combined.
Forming the Truffles
Sweetening the mixture
Now, it’s time to make it sweet! Gradually sift in the powdered sugar while mixing. Keep going until the truffle mixture is completely smooth. Add a pinch of sea salt to bring out the flavors and stir until combined.
Chilling the mixture
Cover the bowl tightly with plastic wrap. Place it in the refrigerator for about 30 minutes. This will firm up the mixture so you can handle it easily.
Shaping and coating
After chilling, use a small cookie scoop or spoon to take portions of the truffle mixture. Roll each portion into a smooth ball with your hands. Prepare two shallow bowls: one with cocoa powder and another with crushed nuts. Roll half of the truffles in cocoa powder and the other half in crushed nuts. Make sure they are evenly coated.
Place the coated truffles on a baking sheet lined with parchment paper. Return them to the fridge for another 30 minutes. This final chill helps the truffles set completely before you serve them.
Tips & Tricks
Perfecting the Texture
To ensure creaminess in your truffles, start with room temperature cream cheese. This helps mix well with the melted chocolate. Beat the cream cheese until it is smooth and free of lumps. This step is key to a silky finish.
When coating your truffles, use shallow bowls for the cocoa powder and crushed nuts. This makes rolling easier and keeps the mess down. Be sure to roll each truffle evenly. This way, every bite is a delight.
Presentation Enhancements
Arranging truffles for serving can elevate your dessert. Place them on a decorative plate, and dust a bit of cocoa powder on top for flair. You can also use small, colorful paper cups. They make the truffles look gift-worthy and fun.
For gifts, consider using clear bags tied with ribbons. This adds a personal touch. You can also create a layered box for a stunning display. Your friends will love receiving these treats!
Pro Tips
- Use High-Quality Chocolate: The flavor of your truffles will depend significantly on the chocolate you choose. Opt for high-quality semi-sweet chocolate chips for the best taste.
- Chill Properly: Ensure the mixture is adequately chilled before shaping. This helps in creating perfectly round truffles and makes handling easier.
- Experiment with Coatings: Don’t limit yourself to cocoa powder and nuts. Try rolling your truffles in shredded coconut, finely crushed cookies, or even sprinkles for added flavor and texture.
- Presentation Matters: Use decorative containers or paper cups to enhance the visual appeal of your truffles. A beautiful presentation makes them perfect for gifting!
Variations
Flavor Combinations
You can easily change the flavors of your cream cheese chocolate truffles. Adding extracts makes a big difference. Try almond extract for a nutty twist. Orange extract adds a bright, fresh taste. Just a teaspoon will transform your truffles.
Mixing in spices can also add fun flavors. A pinch of cinnamon brings warmth and depth. For a bold choice, add a dash of chili powder. It gives a surprising kick that pairs well with chocolate.
Different Coatings
Coating your truffles opens up a world of creativity. Instead of cocoa powder, you can use crushed candy canes. It adds a festive touch and a nice crunch. Sprinkles are another fun option. They give a pop of color and joy.
You can also experiment with flavored chocolates for coating. Try using white chocolate for a sweeter taste. Dark chocolate adds richness and depth. Each coating changes the overall flavor, making each bite unique.
Storage Info
Recommended Storage Methods
To keep your cream cheese chocolate truffles fresh, store them in the fridge. Place them in an airtight container. This will prevent them from drying out. You can stack them gently to save space.
If you want to keep them longer, freezing is a great option. To freeze, place the truffles on a baking sheet first. Once they are solid, transfer them to a freezer-safe bag or container. This method keeps them safe from freezer burn.
Shelf Life
These truffles can last about one week in the fridge. If frozen, they can stay good for up to three months. Just remember to let them thaw in the fridge before enjoying them again. Proper storage helps maintain their creamy texture and rich flavor.
FAQs
Can I use different types of chocolate?
Yes, you can use dark or white chocolate for your truffles. Dark chocolate gives a rich taste. It can enhance the flavor of your truffles. White chocolate creates a sweeter treat. You can mix and match to find your favorite blend.
What can I replace cream cheese with?
If you want a dairy-free option, try using vegan cream cheese. You can also use cashew cream. This gives a similar creamy texture. Silken tofu blended until smooth is another good choice. These options keep your truffles tasty and creamy.
How do I make truffles firmer?
To make your truffles firmer, chill the mixture longer. Refrigerate it for at least an hour. If they are still soft, add more powdered sugar. This thickens the mixture without changing the taste. Rolling them in cocoa powder also helps firm them up.
In this blog post, we explored how to make delicious chocolate truffles. We covered ingredients, detailed preparation steps, and provided tips for perfecting texture and presentation. We also discussed fun variations and essential storage info.
Now, you have all the tools to create these tasty treats. Experiment with flavors and coatings. Enjoy sharing your homemade truffles, or keep them all to yourself. Happy truffle makin