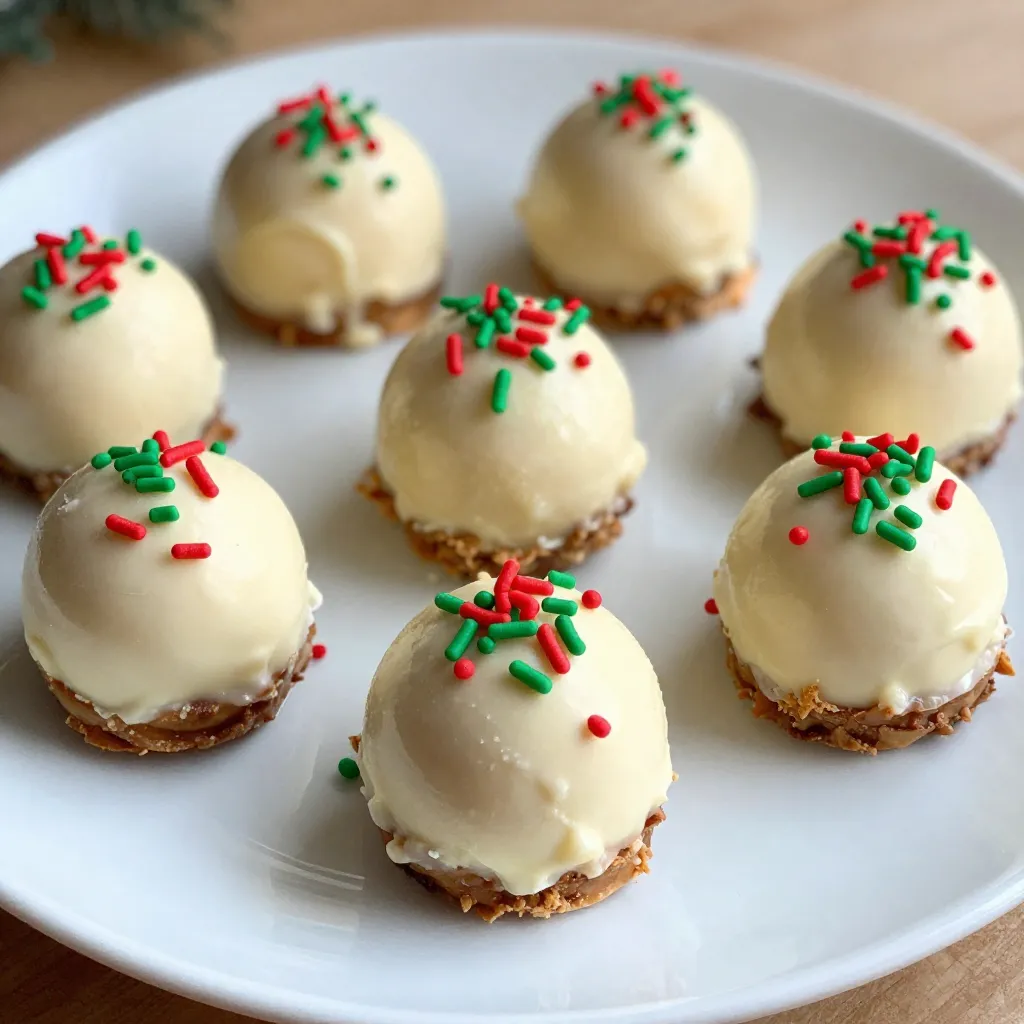
Are you ready to wow your friends and family this holiday season? Christmas Cheesecake Bites are the perfect treat to add a festive touch to your celebrations. With creamy cheese, sweet chocolate, and fun sprinkles, these bites will delight everyone. Best of all, they’re easy to make! Dive into this simple recipe and discover exciting flavors that will make your holiday gatherings even more special. Let’s get started!
Why I Love This Recipe
- Easy to Make: These cheesecake bites come together quickly, making them perfect for last-minute holiday gatherings.
- Festive Flavor: The combination of cream cheese, peppermint, and chocolate creates a delightful holiday flavor that everyone loves.
- Perfect for Sharing: With 24 bites in a batch, they’re great for parties and can be enjoyed by family and friends.
- Customizable: You can easily modify the toppings or fillings to suit your taste, making each batch unique.
Ingredients
Main Ingredients
– 8 oz cream cheese
– 1/2 cup powdered sugar
– 1 teaspoon pure vanilla extract
– 1/2 teaspoon peppermint extract
To start, we need cream cheese. It gives our bites that rich, smooth texture. Powdered sugar adds sweetness without being grainy. Vanilla extract brings warmth, while peppermint extract gives a holiday twist.
Additional Ingredients
– 1 cup graham cracker crumbs
– 1/2 cup unsalted butter, melted
– 1/4 cup mini chocolate chips
– 12 oz white chocolate for coating
Next, graham cracker crumbs serve as a base. They add a nice crunch. Unsalted butter helps bind the crumbs. Mini chocolate chips bring delightful bursts of sweetness. White chocolate coats the bites, making them festive and yummy.
Decoration Ingredients
– Red and green sprinkles
Finally, we have red and green sprinkles. They add color and cheer. A sprinkle of these gives your bites a holiday vibe. You can use them for a fun touch.

Step-by-Step Instructions
Preparation Steps
1. In a large bowl, beat the cream cheese with an electric mixer.
2. Mix until smooth. This makes a nice base.
3. Gradually add the powdered sugar, vanilla, and peppermint extract.
4. Keep mixing until fluffy and well blended.
5. In another bowl, mix the graham cracker crumbs with melted butter.
6. Stir until it feels like wet sand and holds shape.
7. Gently fold the crumb mixture into the cream cheese mix.
8. Be careful not to over-mix. You want it combined but not too soft.
9. Add the mini chocolate chips and stir gently to blend them in well.
Forming the Bites
1. Use a small cookie scoop or your hands.
2. Scoop out portions of the mixture.
3. Roll each portion into a ball, about 1 inch wide.
4. Place the balls on a parchment-lined baking sheet.
5. Make sure to space them evenly apart.
6. Refrigerate for at least 1 hour. This helps them hold shape.
Coating the Bites
1. While the bites chill, melt the white chocolate.
2. Use a microwave-safe bowl for this.
3. Heat the chocolate in 30-second intervals, stirring in between.
4. Once melted and smooth, dip each cheesecake bite in the chocolate.
5. Make sure each bite is fully coated.
6. Let any extra chocolate drip off.
7. Place them back on the parchment-lined sheet.
8. Quickly sprinkle red and green sprinkles on top.
9. Chill the bites for another 30 minutes to harden the chocolate.
Enjoy your festive and tasty Christmas Cheesecake Bites!
Tips & Tricks
Mixing Techniques
To get the best texture for your cheesecake bites, start with soft cream cheese. This helps you mix it easily. I suggest using an electric mixer on medium speed. Beat the cream cheese until it’s smooth and creamy, with no lumps. Next, add the powdered sugar slowly. Mixing gradually ensures a fluffy blend. Don’t rush this step! After that, mix in your vanilla and peppermint extracts. These flavors make your bites special. When you combine the graham cracker crumbs with the cream cheese mixture, fold gently. This keeps the texture light and airy.
Chilling Tips
Chilling is key to making your cheesecake bites firm. After you shape them into balls, place them in the fridge for at least one hour. This helps them hold their shape when you dip them in chocolate. If you skip this step, your bites may fall apart. After dipping in white chocolate, chill them again for thirty minutes. This sets the coating and gives you a nice finish.
Decorating Suggestions
Get creative with toppings! Red and green sprinkles are a must for a festive look. You can also drizzle extra white chocolate on top for a fun touch. Want to switch it up? Try using crushed peppermint candies or colorful candy cane pieces. These add a nice crunch and extra flavor. Use your favorite toppings to make each bite unique!
Pro Tips
- Use Room Temperature Cream Cheese: This ensures a smoother mixture and prevents lumps, allowing for a creamier cheesecake filling.
- Chill Before Coating: Refrigerating the cheesecake bites before dipping them in chocolate helps them maintain their shape and prevents melting.
- Customize Your Sprinkles: Feel free to use other festive sprinkles like stars or snowflakes to match your holiday theme!
- Experiment with Flavors: Try adding different extracts like almond or hazelnut for a unique twist on the classic flavor.
Variations
Flavor Variations
You can change the taste of your cheesecake bites easily. Adding different extracts can create fun new flavors. For example, try almond extract for a nutty twist. You can even add eggnog flavor for a holiday touch. This gives a warm and festive vibe. Get creative with flavors to match your taste.
Dietary Adaptations
If you need gluten-free options, choose gluten-free graham crackers. They work just as well in this recipe. For dairy-free alternatives, use vegan cream cheese. This way, everyone can enjoy these treats. Adjusting recipes makes them more inclusive for guests. Don’t hesitate to experiment with these options!
Storage Info
Short-Term Storage
To keep leftover cheesecake bites fresh, place them in an airtight container. Store them in the fridge for up to five days. This helps maintain their creamy texture and flavor. If you want to enjoy them later, avoid adding the sprinkles until you’re ready to serve.
Long-Term Storage
You can freeze cheesecake bites for longer storage. Place them on a baking sheet in a single layer. Freeze them until firm, about one hour. After that, transfer the bites to a freezer-safe bag. They can last up to two months in the freezer.
When you’re ready to enjoy them, take out the bites and let them thaw in the fridge overnight. This keeps them firm and tasty. For serving, you can drizzle more white chocolate on top and add fresh sprinkles for a festive look.
FAQs
How long do Christmas Cheesecake Bites last?
Christmas Cheesecake Bites can last up to one week in the fridge. Store them in an airtight container. This keeps them fresh and tasty for your holiday gatherings. If you want them to last longer, you can freeze them.
Can I use other types of chocolate for coating?
Yes! You can use dark or milk chocolate instead of white chocolate. Each type adds a unique flavor. Just melt the chocolate the same way you would with white chocolate. Make sure to dip your bites fully for the best taste.
How can I make these treats ahead of time?
You can prepare the cheesecake mixture a day in advance. Just store it in the fridge until you’re ready to roll it into balls. You can also dip and decorate the bites a day ahead. Just keep them chilled until serving.
You’ve learned how to make Christmas Cheesecake Bites that charm everyone. With cream cheese, tasty extracts, and chocolate, these treats are fun and easy to prepare. Remember to chill them well for the best texture. You can also play with flavors or make them gluten-free or dairy-free. Store extras in the fridge or freezer to enjoy later. Explore your creativity in decorating and give them your own twist. Now, treat yourself and others to these delightful bites during the holiday